Showing posts with label upcyling. Show all posts

Jul 6, 2012

Shabby Chic Jewelry-holder tutorial

 This is such an easy and thrifty solution to hang your jewelry from. If you're like me, you want to be able to see them so you can easily choose which piece you want to wear. And like most people, I had more wall space than I  counter space, so this was a great solution for me!


I found an old picture frame at the thrift store (the one with the velvet in-lay). This isn't the one, but I forgot to take a "before" picture--and this one's pretty close to what it looked like. I paid $1.00 for it.

 
 Next, I bought a subtle off-white paint sample at Home Depot. It was an "oops", so I paid $.50 for it.
I painted the whole thing a few times--taking special care to liberally coat the velvet. As soon as all coats were dry, I lightly sanded the edges and detail to give it an aged look. Then I drilled 5 evenly spaced holes in the velvet part.
 Also at Home Depot, I bought the cheapest wooden knobs I could find and painted them.
 This is what they looked like scuffed and installed. Cute, aren't they?
 Then, I stretched a piece of fabric (cut 1" bigger on all sides) over Dollar Store foam core using hot glue on the back.
 I decided at the last minute to add more hooks on the bottom.
 Here's the finished product. I also made one to hold my hair accessories by gluing vertical pieces of ribbon on it.
That's it! I have been absolutely loving it! Not only is it very functional and cleared up quite a bit of space for me, but it's such a fun way to add pops of color to a drab wall!

Apr 25, 2012

Scrap Paper Clock Tutorial

I started with my color inspiration. These are the colors of my kitchen...
 So I found some scrapbook paper in my stash that coordinated.

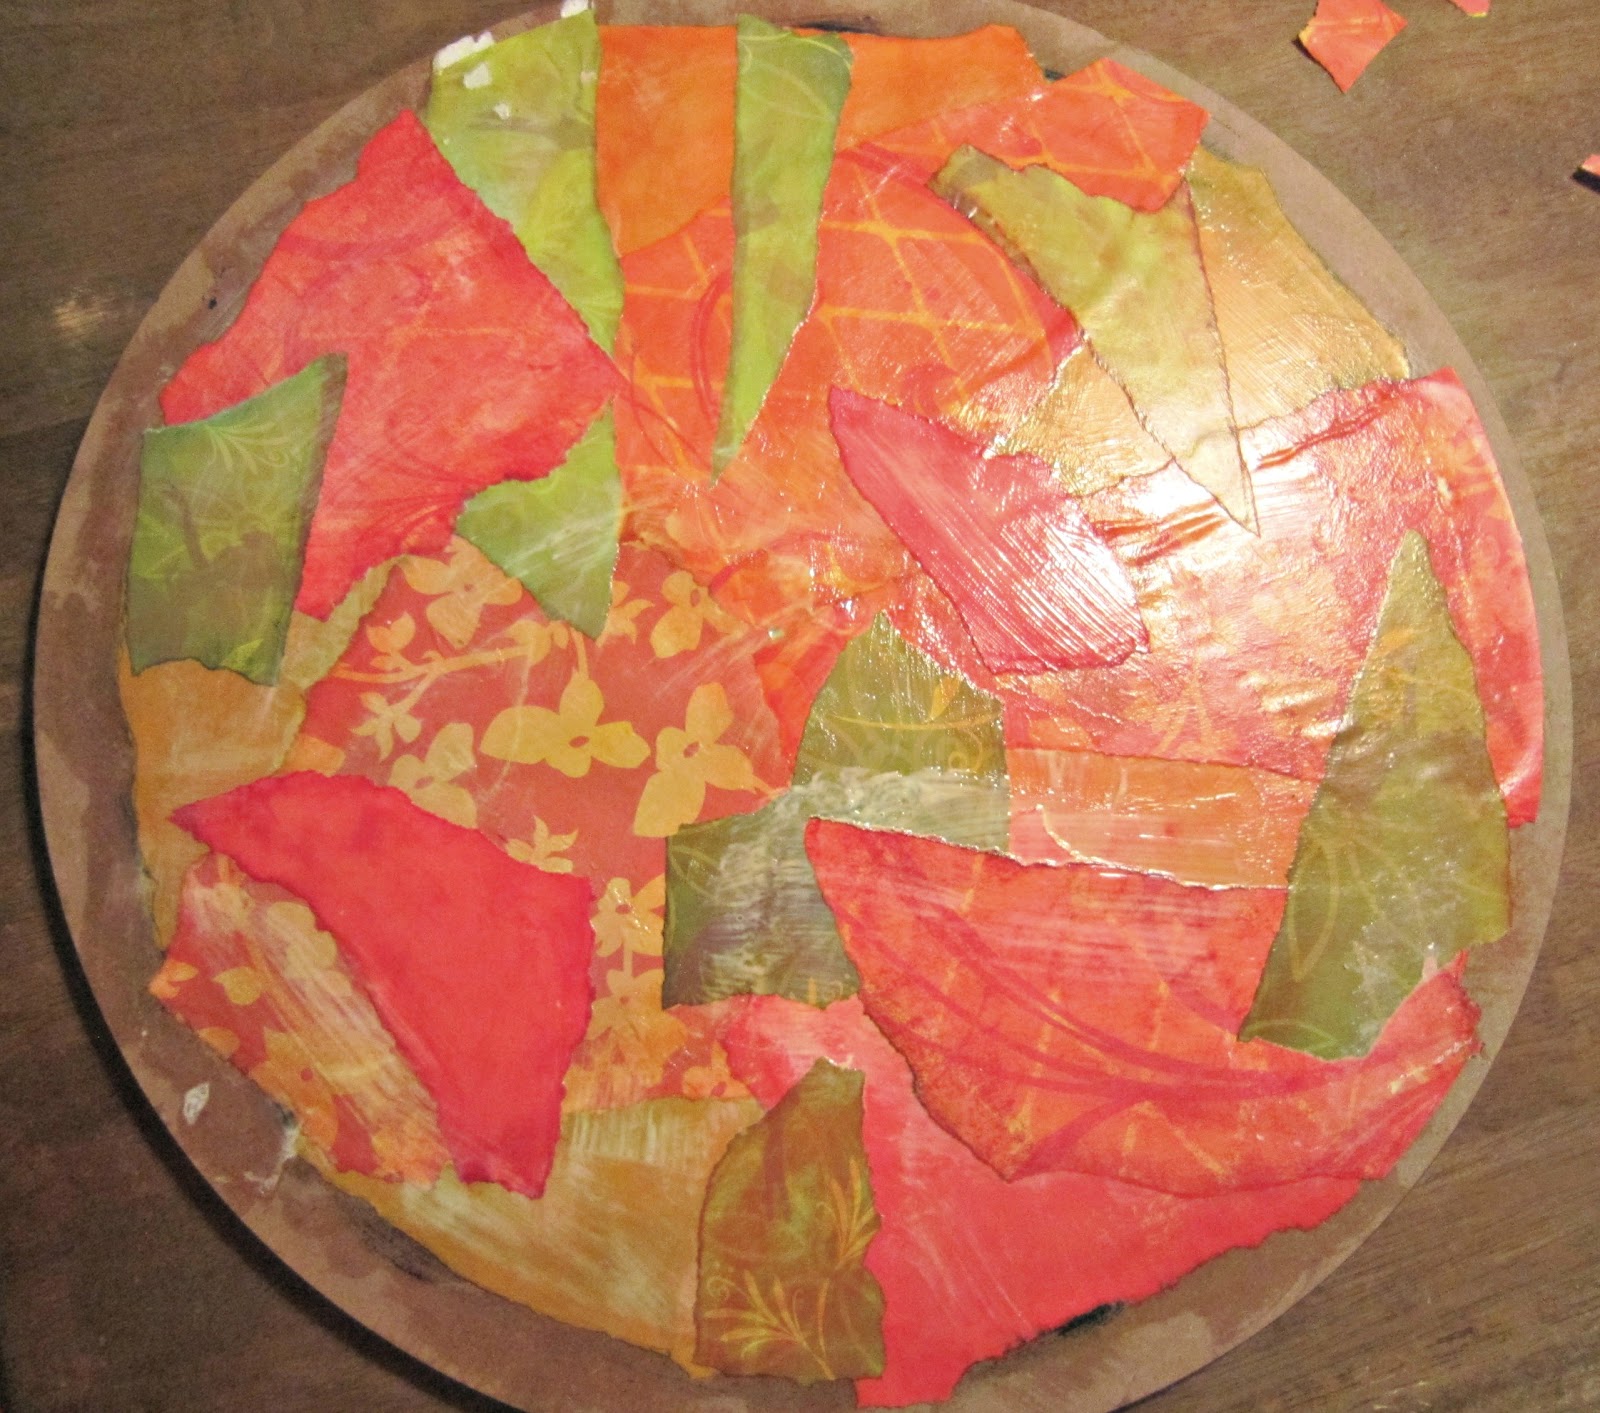
 I tore them into random pieces...
 and distressed the edges with stamps.
I bought this at the thrift store for $2.
In it's former life, it was a lazy susan that used to reside in the middle of someone's kitchen table.
I cleaned it, painted it, and removed the outside ring. I also drilled a hole in the center.
Using Mod Podge, I glued each piece down individually (paying close attention to smooth out bubbles). No rhyme or reason.
Once my clock was covered, I lightly sealed the whole thing in Mod Podge.
 I glued the outer ring back on. If you don't have one, I bet you could cut one out of posterboard and decopage that on, too.
I bought these numbers, painted them black, then lightly sanded the edges.
Then I glued them down starting with 12 and 6, then did 9 and 3.
I used these pencils to help me position them, then I eyeballed the rest. 
 
Ready for the clock gears!
 This is what they look like. I paid about $6.00 for this gear set.
It's easy to put together (they come with instructions).
There you have it--my customized clock!
 I set it on an easel. I just love checking the time now!

Mar 30, 2012

How to Organize Children's Bookshelves

This was one of our bookshelves just a couple weeks ago. I had the other one on a different wall, but only took this pic, so picture this times two. That was the amount of books that lived in my 3 boys' room. Both were packed to the brim and we had no sense of organization whatsoever. I can't tell you how many times I had straightened the books up just to have them look like this again within days.
So, I was helping out in one of my son's classrooms and I couldn't help but notice how nice and organized her bookshelves were! She had a bunch of labeled bins and they looked so nice! I went right home and started looking up bookshelf organization ideas. It made so much sense!
The key is to make it easier to keep it clean than to mess it up. It's so nice and easy for kids to pull out a bin, flip through until they find the book they'd like, take it, then push the bin back in it's place. It's much better than looking at the spine of the book (kids like to see the fronts, anyway!), then pulling out a whole slew of them until they've decided on the perfect book, leaving a pile of un-wanted books on the floor. Why hadn't I thought of this before??? I've been a mom for 10 years. I've been battling with organizing my kid's bookshelves nearly evey day of those 10 years! What a waste of time; it kills me to know how much easier it could've been for me!

Let me introduce you to our new, organized shelves. I know you're thinking- Where are all the books? There's no way you fit what was crammed in the picture above (times 2) in these shelves. But it's TRUE! I DID! I only threw away a few books that had totally fallen apart and were missing pages. It's amazing how much extra SPACE we have on the shelves now!
Below is a picture I took AFTER a full day of the kids pulling out and reading books. Hardly a mess- and it only took seconds to put back.
I decided to test this new system out and see how well we could keep it up...and here we are two weeks later with perfectly organized bookshelves still!
 Since I knew it was something we could maintain, I decided to make labels for each category. I was out of my laminating sheets, so I used packing tape.
Here they are after labels-
Looks better with the labels, doesn't it?
I categorized them as-
Chapter Books, Early Reader Books, Rhythm & Rhyme books, Abc books, Bedtime Stories, Religious books, Non-fiction, Scriptures, Holiday books, Animal books, Little Golden books, Disney, Seuss, Muppets, and misc. Some of the labels were placed on the edge of the shelf itself.

 I used these wash basins from the dollar store-
 And shoe boxes-
 I found this bin for the books that didn't fit on the shelves-
 Ah, organization! :)
 I was having so much fun, I decided to put new labels on some of our toy bins.
Double yay for a system that finally works for us! I'm so happy, I could just...I don't know...go organize something else!
Now, I'm off to the girl's bookshelves!

Mar 26, 2012

Easter Wreath

I've been wanting a new Easter Wreath. Especially after seeing the cutest idea from Pinterest. I had a spare morning today, so I decided to make a new Easter wreath. I was inspired by my daughter's birthday party color scheme from the weekend. I loved her colors so much, I decided I definitely wanted them on my door. ;)
Tutorial-
Step 1
 I gathered old plastic eggs from last year
and ribbon that fit the colors I was going for.
Then I made a wreath using a pool noodle
(Got the idea HERE- it's so smart.)
Step 2
 I grabbed some flannel and tore it into 3" strips.
Starting at an angle, I hot-glued the end and
wrapped it around. I ended up using 4 pieces.
No bigs--you can't tell when you're done.
 Step 3
 Next, I wrapped it with thin ribbon on a diagonal one
way, then did it again the opposite way making sure
they cross on the front. Then I glued ribbon on the eggs. 
Step 4- THE BOW
 Make a loop- pinching between your thumb and pointer finger.
Make another loop toward you, pinching in the center (or base)
of the bow. Add another, making the bow evenly balanced.
*THE SECRET TO A NICE BOW IS KEEPING YOUR
THUMB FIRMLY AT THE BASE THE ENTIRE TIME.*
While keeping your thumb in place, the under-side will be held
alternately by your pointer and middle finger (the strongest fingers).
As you accept a new loop, use the finger you didn't use in the last
and trade off for every other loop. Keep practicing...you'll get it.
Step 5
 Make as many loops as you'd like. I made these ones bigger than
I usually do. If you'd like tails, take the end and coil it onto itself.
I looped it twice here so I could have 4 tails. Secure with wire.
Pipe cleaners or string work, too. Fluff/arrange the loops of bow.
Step 6-ADDING TO THE BOW
 I sometimes like to add loops to my bows using different ribbon.
Make bunny ears, securing in the center with wire, then fold up.
Lift original bow's loops and add new loops to the base w/ wire.
Repeat as many times as you'd like. I added 4 "bunny ear" sets.
Step 7
 Decide where you want the bow, add a dab of glue, and place it.
Wrap around the back with wire. Trim tails and fluff your bow.
I know it looks like a WAY HUGE bow, but it trust me-
It needs to be so we have room to nestle all the cute eggs.
Step 8
 Now you're ready to add the eggs. Really, just glue and place.
If you're placing them on the sides of the bow, it's best to make
sure the egg's secured to the wreath itself, too. Otherwise, just
spread loops apart, and glue close to base. This is the fun part.

 Here it is finished. Look how different the colors look inside my
house as opposed to outside on my door. I prefer the sun-
kissed version--looks more "Easter-y"! I so love these colors!

Have fun with it! If you decide to make this wreath,
send me a link to your blog and show me!
I'd love to see your variation!

I'm linking up to-
Topsy Turvy Tuesday at I'm Topsy Turvy
Get Your Craft On at TCB
Take a Look Tuesday at Sugar Bee
Sew Cute Tuesday at Creative Itch
Show Me What Ya Got at Not Just a Housewife
Tuesday Tutorials at The Kurtz Corner
Turning the Daunting into Do-Able at The Project Queen

Feb 10, 2011

I'm gonna blog about a frog...

THIS frog. Who says Valentine boxes have to be boxes? And GREEN is a perfect color for the occasion, right? Well, it works for us!


Here he is! He looks love sick, doesn't he?
Lift his tongue to open his mouth.
 
Take a clean, empty can. Hot glue
the lid on.


Trace your can on to the center of a
piece of card stock. Any color will
do; it won't be seen (here's an
opportunity to re-purpose).


Draw legs & eyes. Line up a second
sheet underneath it.

Cut both pieces of card stock out.
Cut the eyes off one of them.

Using those pieces, trace and cut out
4 green felt legs and one set of eyes.
Set aside for later.
(I marked the fronts & backs of
these, but did it on the wrong
sides! Use a pin to mark it so you
don't make my same mistake!)
Okay, now you're ready to roll. Lay your can down on to a piece of felt. Roll it like you would if you were wrapping a gift and cut it AT LEAST a half an inch too big on both sides. Glue it on using a hot glue gun. Overlap the felt on the circumference of the can... just a little.

Glue the extra felt down on
to the rim. Do the same the
plastic lid on the other side.

Now take your circle w/ legs and cut a piece of felt about an
inch bigger around the cut-out. Cut slits all the way around
and start gluing one tab down at a time, gently pulling it in
the direction needed to make it straight against the sides.

This is kind of what it'll look like.

Glue on one pair of legs to cover tabs.
 Line it up as evenly as you can.


Now glue his cute bum to the bottom of the can.
Add a heart.


To cut the mouth out, pinch the
center of the felt and cut to make a
hole to start from.

Do the same thing you did with the backside, to the front.
Wait to glue the inside of the mouth in the next step.
Glue the head onto the plastic lid side of the can. Make
sure it lines up the same as the back (so it stands okay).

NOW, glue the mouth tabs to the inside of the plastic lid.
Glue the remaining legs & eyes onto the back of the head. 

Now, it's ready for YOUR creativity!
 THIS IS THE FUN PART!
Make a mouth at least 1/2" bigger than the hole. Glue
on at the TOP OF MOUTH ONLY!
Add whatever you want now!

"Feed me"!
 That's it! It's not too difficult, but is a little time-consuming. It's worth the effort, though! Let me know if you come up with your own version of this! I'd love to see it!

Here are a few more ideas!
We made the puppy out of a baby formula can. The love
bug is made from a frosting container. Instead of a flap, I
made that one so the whole lid (face) can come on & off.

HAPPY CREATING!
Related Posts Plugin for WordPress, Blogger...