Showing posts with label paper. Show all posts

Jun 16, 2012

DIY Father's Day Plaque


I made this plaque for my husband last year. I went through my files and found some precious pictures of my husband with our kids. I used picnik (which no longer exists) to tint them, but my favorite is now Pic monkey. It's very similar to picnik.


Instructions-
I cut a 1/4" thick piece of wood to 13" x 16" and painted it black (any kind of paint will do). Next, I printed and cut 14 pictures to 3"x3". Then I made an 8x10 with the quote- "Blessed is the man who fills his Arms with his Children" (I personalized it by adding Happy Father's Day and the date). I cut it to 6 1/8" x 9 1/8". I layed the pictures out before gluing them down and made light pencil marks to give myself a guide. I used Mod Podge to glue them down. Once they were dry, I thinned some Mod Podge with a little water and painted over the whole plaque, leaving a light texture (I used a wad of paper to lightly pounce over the plaque). Aaaaand, that's it! When it's finished, there's approximately (it's not perfect all the way around...and that's okay!) 1/4" around the whole outside edge.

Have fun!

Apr 25, 2012

Scrap Paper Clock Tutorial

I started with my color inspiration. These are the colors of my kitchen...
 So I found some scrapbook paper in my stash that coordinated.

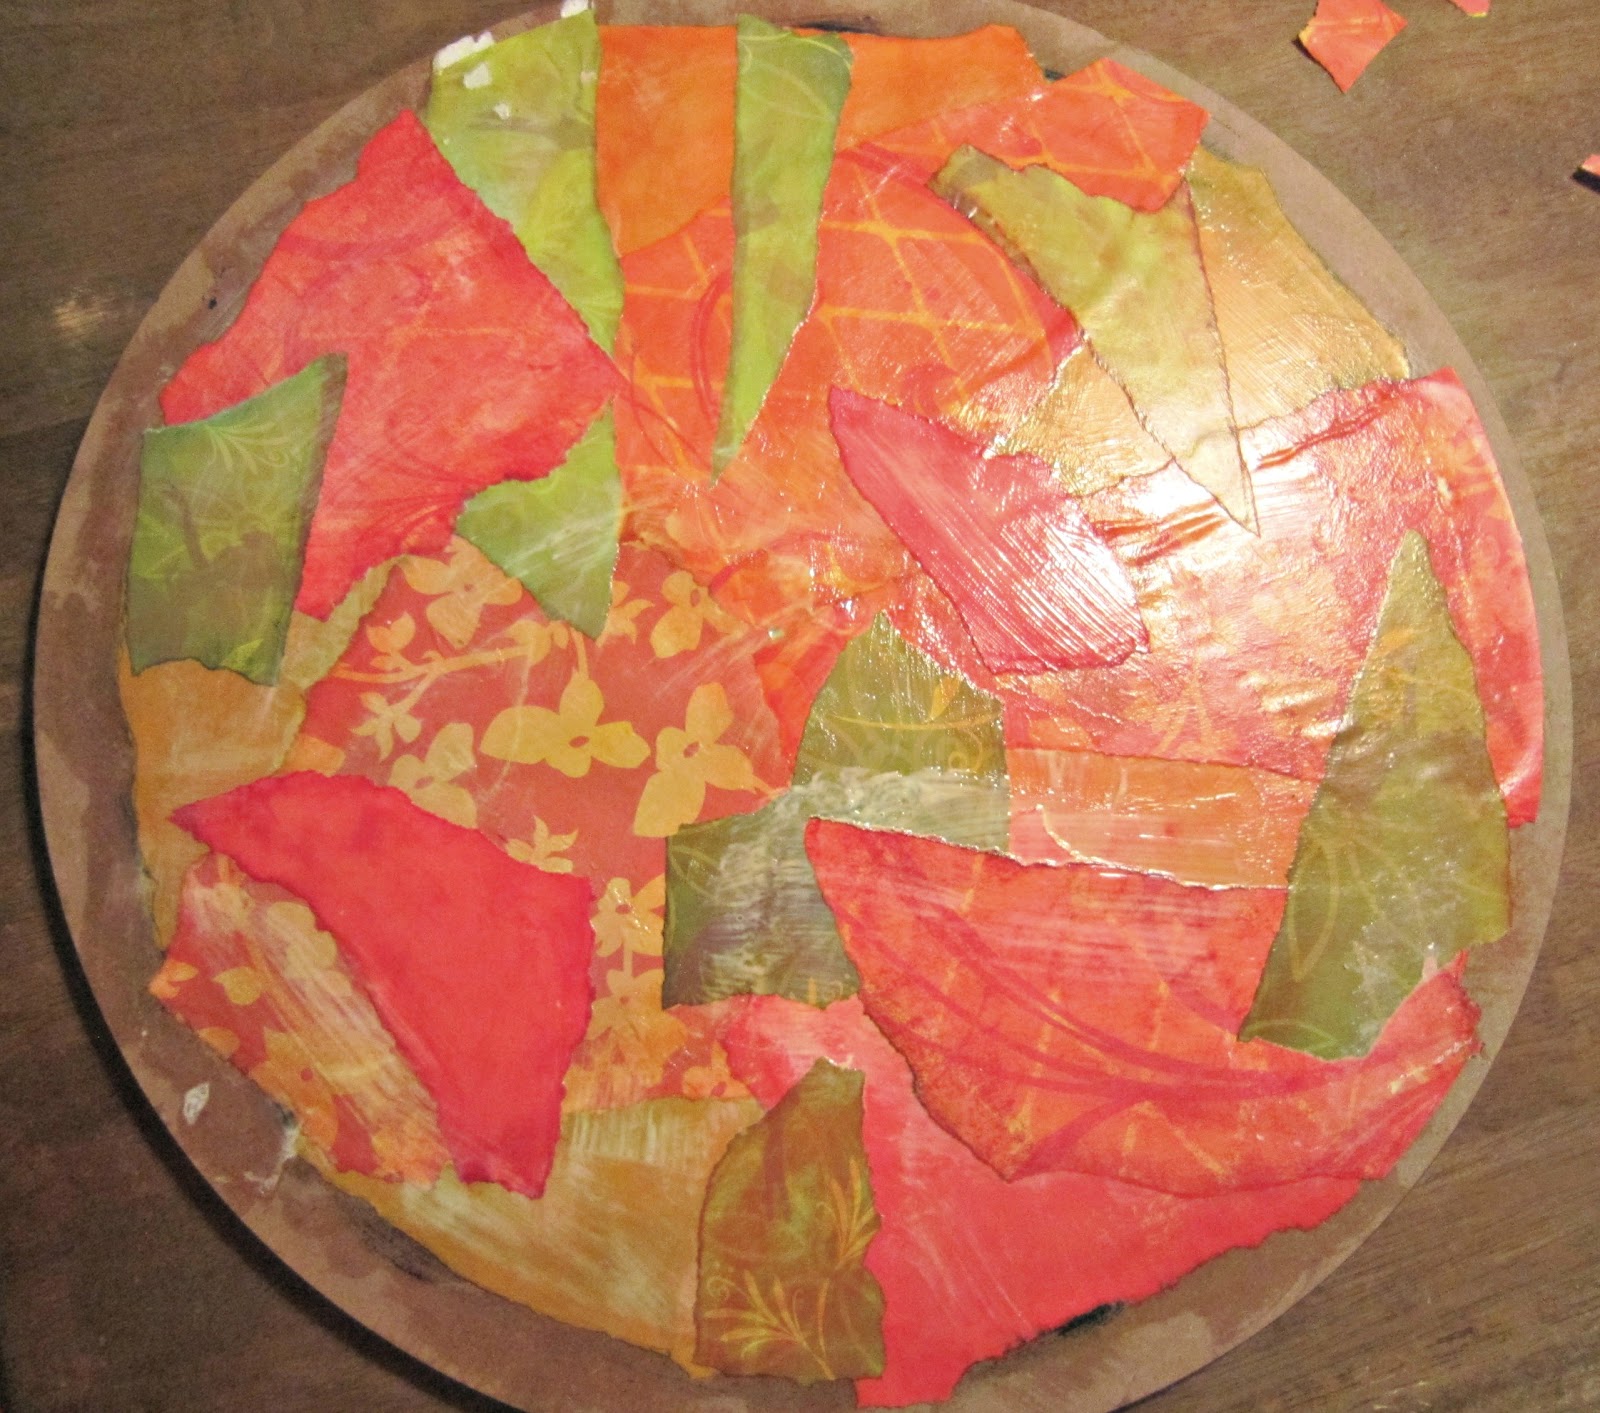
 I tore them into random pieces...
 and distressed the edges with stamps.
I bought this at the thrift store for $2.
In it's former life, it was a lazy susan that used to reside in the middle of someone's kitchen table.
I cleaned it, painted it, and removed the outside ring. I also drilled a hole in the center.
Using Mod Podge, I glued each piece down individually (paying close attention to smooth out bubbles). No rhyme or reason.
Once my clock was covered, I lightly sealed the whole thing in Mod Podge.
 I glued the outer ring back on. If you don't have one, I bet you could cut one out of posterboard and decopage that on, too.
I bought these numbers, painted them black, then lightly sanded the edges.
Then I glued them down starting with 12 and 6, then did 9 and 3.
I used these pencils to help me position them, then I eyeballed the rest. 
 
Ready for the clock gears!
 This is what they look like. I paid about $6.00 for this gear set.
It's easy to put together (they come with instructions).
There you have it--my customized clock!
 I set it on an easel. I just love checking the time now!

Mar 16, 2012

The Leprechaun's SECRET to GOOD LUCK- Service Project

It's St. Patrick's Day TOMORROW. Wow, it kinda snuck up on me. I promised a friend I'd hurry and do this post before then, so here I go.

Ok, so let me start by saying- WE LOVE HOLIDAYS. Give us ANY reason to celebrate and throw a party and WE WILL. St. Patrick's Day is no exception. It seems to be one of those overlooked holidays, doesn't it? I think it's fun to learn the history of how the holiday came to be, so my family and I started a tradition a couple years ago that I'm going to share with you.

First, we listen to Irish/Celtic music all day long. Here's a playlist of our favorite Irish/Celtic Irish/Celtic music from Grooveshark.We're really into music of all different kinds, so it works for us. As we get into the spirit of the day, we teach the history behind the holiday to the kids. I've included the links we use: The history behind St. Patrick's Day and fun facts about the holiday, clovers, the Irish, and St. Patrick himself. I like these versions (from Kaboose) because they're fun and easy for kids to understand.
As we eat our breakfast, (see my recipe for Green Pina Colada Waffles here), we make a game plan as we think of different acts of service we can do for people in our area. For one of our projects last year, we weeded a small garden for a neighbor (we did it while they weren't home) and left a treat and a note:
To use this image, right click and save as picture to desktop.
In a word document, insert this pic (from file-- desktop), resize, and print.
 Actually, we left a little different version, but I changed it up a bit for this year.
(I sure hope they don't see this, or our cover's blown!)
Sorry about the blurry pic.
My kids- finding joy in service.
 Not sure he's likin' it yet. Notice the jacket... WITH shorts and flip-flops. Yeah, I know.
He's got a big one...and a dirt smudge on his head.
No, he's not a contortionist. He's just holding his handful of weeds awkwardly.

Rainbow marshmallow pictures was another activity we did.

FOOD-
Some times, we go authentic and eat traditional Irish food, which I love! Tons of recipes found here.

But most of the time, we just eat green food (my kids eat it better). Click here for my BLT Club Wrap w/ Avacado on a Spinach & Herb Tortilla recipe. Click here for my Fruit rainbow-topped jello. Click here for my Creamy Asparagus Soup recipe.

After a long day of service, we enjoyed a nice, candle-lit green meal-

For this particular meal, we had those wraps mentioned above, Guacamole chips, brocco-flower, celery, green grapes, kiwi, and green-colored Sprite. We also had a green salad (not pictured).

Happy St. Patrick's Day, everyone.

Jan 25, 2012

Teacher Supply Cake

 Ok, so I've been spending a lot of time on Pinterest! Can you tell? Haha! I love it! No shame!
Anyway, I was looking for some cute ideas for my son's teacher. I'm a room mom in Mrs. Olson's class, and we missed her birthday (it was near the beginning of the school year), so I decided we'd surprise her with an UN-birthday party! Here's her cake!
 I sent a note home to the parents, and quite a few sent money so I could do all this! Awesome!

I combined ideas from THIS, THIS, THIS, and THIS pin on Pinterest. Also, I got the free (awesome, right?) fonts from HERE and HERE...also from Pinterest. I am also a beneficiary of said free fonts. :)


See this girl here? (Don't mind the glittery thing covering her eye.) I adore her. She has taught 4 of my 5 kids in Kindergarten. Let me tell ya- It takes a special person to teach Kindergarten for 20+ years and still love every day. She is the sweetest, most loving, compassionate teacher. Perfect for my clingy, needy 5yr old. And after so many years of teaching, she really knows her stuff! I'm so thankful for all she does and has done for my kids. LOVE her.

There's no way I was going to let her get away without a birthday party!

I'll post more about the other things we did today during her party later...

Jan 23, 2012

Heart attacks, Fancy Dinner, and Chocolate Fondue

We had such an awesome Valentine's day last year! We spent it with our WHOLE family and was seriously the BEST!
We started out by giving a couple of "Heart Attacks"! This has become a tradition of ours.

We took pretzels, stuck heart-shaped strawberry marshmallows on them, dipped 'em in chocolate, then topped with sprinkles. Here's an earlier post I did about these treats. Once the choco-mallow pops were cool, we fixed plates, cut out hearts and let the kids write on them.


Then, my husband took the kids to deliver the goods.


 We couldn't think of any one better to attack than our widowed Great Grandma Brady (my mom's mom) and Great Grandpa Anderson (my dad's dad). We couldn't let them be alone on Valentine's day!

They silently attacked houses with hearts and left a plate of goodies. Grandma B. had no idea! When they had gotten every heart perfectly placed, the kids and Joey rang the doorbell and hid. When grandma came to the door, they jumped out and surprised her! She got kind of emotional. She said we made her day! Doesn't get much better than that! They stayed a little while and told her how special she is to them.

They did the same thing to Grandpa A., only he caught them in the act! He saw them out the window! Haha! The kids finished while Grandpa, with a full heart, watched them. They stayed and talked while he shared oranges and chocolate-covered peanuts. He was so appreciative! He left his hearts up proudly for a few days.
What a fun little service project!

If you don't want to use tape, you can use a magnet for their door (most doors are magnetic), or glue each heart to popsicle sticks and peg all over their lawn!

So, while they were gone, I was home setting the mood...

 The ambiance is key! I wanted it to feel special without breakin' out the fine china (I only have enough for 4 of us anyway), so I used cute paper plates and napkins. I placed them on silver platters to make it look like they were on fancy chargers. I hung beads from the chandelier and whipped out the red candles (and red hot candies). Not too bad. The kids absolutely LOVED it! We ate in candlelight the whole time. VERY romantic. ;) For a recipe for the Sweetheart Salad with a sweet and tangy Peach Balsamic Vinegarette, click HERE.

MY VALENTINE'S!
These are the faces of the people who make my life so wonderful. <3

Dinner was a hit!
But as fun as the day was, I have to say that DESSERT was the BEST!
And it was so easy! Just take anything you'd like to dip in chocolate and load it on a plate! We used Dollar Store "Heart Picks" for our skewers. So fun! For the chocolate- just take a bag of chocolate chips and add your favorite creamer (my favorite is coconut <3). Melt in a sauce pan & dip your goodies! I'm sure any creamer would be awesome. We have quite a variety-- we LOVE to use them in our hot chocolate and Pero.
 The kids had a blast coming up with their own little concoctions. There's just something fun about dipping your food, huh? Then, we all decided to tell each person one at a time what we loved about them. We went in a circle until every person had been told by all 6 of the rest of us. BEST PART OF THE NIGHT! Sweet, emotional mommy moment... I discovered that despite all the arguing and pestering, my kids really DO love each other! Very, sweet, perfect end to the night.

Here's a beautiful short video to help your family get into the spirit of Valentine's day- LOVE ONE ANOTHER

Happy Valentine's day!

Check out this PDF for tons more Valentine's Day ideas!

Feb 10, 2011

I'm gonna blog about a frog...

THIS frog. Who says Valentine boxes have to be boxes? And GREEN is a perfect color for the occasion, right? Well, it works for us!


Here he is! He looks love sick, doesn't he?
Lift his tongue to open his mouth.
 
Take a clean, empty can. Hot glue
the lid on.


Trace your can on to the center of a
piece of card stock. Any color will
do; it won't be seen (here's an
opportunity to re-purpose).


Draw legs & eyes. Line up a second
sheet underneath it.

Cut both pieces of card stock out.
Cut the eyes off one of them.

Using those pieces, trace and cut out
4 green felt legs and one set of eyes.
Set aside for later.
(I marked the fronts & backs of
these, but did it on the wrong
sides! Use a pin to mark it so you
don't make my same mistake!)
Okay, now you're ready to roll. Lay your can down on to a piece of felt. Roll it like you would if you were wrapping a gift and cut it AT LEAST a half an inch too big on both sides. Glue it on using a hot glue gun. Overlap the felt on the circumference of the can... just a little.

Glue the extra felt down on
to the rim. Do the same the
plastic lid on the other side.

Now take your circle w/ legs and cut a piece of felt about an
inch bigger around the cut-out. Cut slits all the way around
and start gluing one tab down at a time, gently pulling it in
the direction needed to make it straight against the sides.

This is kind of what it'll look like.

Glue on one pair of legs to cover tabs.
 Line it up as evenly as you can.


Now glue his cute bum to the bottom of the can.
Add a heart.


To cut the mouth out, pinch the
center of the felt and cut to make a
hole to start from.

Do the same thing you did with the backside, to the front.
Wait to glue the inside of the mouth in the next step.
Glue the head onto the plastic lid side of the can. Make
sure it lines up the same as the back (so it stands okay).

NOW, glue the mouth tabs to the inside of the plastic lid.
Glue the remaining legs & eyes onto the back of the head. 

Now, it's ready for YOUR creativity!
 THIS IS THE FUN PART!
Make a mouth at least 1/2" bigger than the hole. Glue
on at the TOP OF MOUTH ONLY!
Add whatever you want now!

"Feed me"!
 That's it! It's not too difficult, but is a little time-consuming. It's worth the effort, though! Let me know if you come up with your own version of this! I'd love to see it!

Here are a few more ideas!
We made the puppy out of a baby formula can. The love
bug is made from a frosting container. Instead of a flap, I
made that one so the whole lid (face) can come on & off.

HAPPY CREATING!
Related Posts Plugin for WordPress, Blogger...